Setting up a UEFI project in Rust
Bootloader Pt. 1
4/25/2024
Contents
Last time, in the introduction I went over what a bootloader actually does: namely transitioning from the default environment provided at boot time, to an environment suited for an operating system kernel to run on.
In this post, we'll go deeper into what that default boot environment is like, and also get some code running.
March 2026 updates
This post was originally written in April 2024. Some things have changed since then:
uefi-rshas deprecated theSystemTableargument that's used to access protocols. I've updated the sample code to match.- Rust now includes a pre-compiled copy of the standard library for the UEFI target. I've removed the section about enabling
build-std.
I've also added a link to a GitHub repository with the actual code described in this post - this will hopefully keep me honest while writing.
If you're interested in the previous version, this very post is also on Github. Take a look.
UEFI
UEFI stands for Unified Extensible Firmware Interface, and it provides a standardized low-level interface for your bootloader to talk to the hardware. We’ll be using this to:
- Draw to the screen
- Get a map of how much memory the system has, and what it’s allocated to
- Read from the disk
The people (well, companies) who designed UEFI publish C files that allow you to call UEFI functions from C, but we’re using Rust. Since Rust can call C, “all” you have to do is painstakingly wrap the C function calls in Rust code and convert the API surface to be idiomatic Rust.
If that sounds like a lot of work, well, it does to me too. Luckily, it’s been done already by the good folks who make the uefi-rs library for Rust. That’ll be the main library we rely on today.
What about BIOS?
A lot of OS tutorials out there use the BIOS (Basic Input Output System), which is sort of like an older version of UEFI (hugely oversimplified). Like UEFI, the BIOS also offers a standardized mechanism to talk to your computer hardware. Unlike UEFI, it was invented two years before Star Wars came out, and requires four steps to even reach the 64-bit mode modern computers run on.
These days, pretty much every computer there runs on UEFI only, and just emulates BIOS for compatibility with old software. Today, we'll just cut out the middleman and use UEFI directly.
Starter code
With that out of the way, let’s setup our project. I’m going to assume anyone reading this knows Rust basics, so spin up a new Cargo binary project and add uefi-rs to your Cargo.toml.
Next, let’s write the starter code. Rust’s main function is designed to be called by your host OS, which won’t work since we’ll be booting directly into our program. Instead, uefi-rs has its own standard for what the main function looks like, which it will transform to be compatible with UEFI's C API.
Your main.rs file will look like this:
#![no_std]
#![no_main]

use core::{fmt::Write};

use uefi::prelude::*;

#[entry]
fn uefi_main() -> Status {
    system::with_stdout(|stdout| stdout.write_str("HELLO I AM A BOOTLOADER.").unwrap());
    loop {}
}
I'll explain line by line:
#![no_std] tells Rust that it can’t use the default standard library, since that depends on an OS, which we don’t have. #![no_main] does something similar, telling Rust that there isn’t going to be a default main function.
The #[entry] attribute at the top of uefi_main marks your function as the main function so uefi-rs knows where it is. This allows it to transform it like we mentioned above, and also check if you’ve declared it properly.
Finally, there's the actual main function. The first line logs a helpful message and the second one loops forever so our program doesn't immediately terminate.
My VS Code is complaining about tests
That no_std will cause your VS Code Rust extension (if you use it) to complain about a missing “test” crate. Disable tests/benchmarks in your Cargo.toml to fix it. To do that, add this to the top of the file:
[[bin]]
name= "your-crate-name"
path = "src/main.rs"
test = false
bench = false
With the setup done, let's do a cargo run and see what happens. Will it work?
Do panic
No.
error: `#[panic_handler]` function required, but not found

error: language item required, but not found: `eh_personality`
  |
  = note: this can occur when a binary crate with `#![no_std]` is compiled for a target where `eh_personality` is defined in the standard library
  = help: you may be able to compile for a target that doesn't need `eh_personality`, specify a target with `--target` or in `.cargo/config`
Makes sense - the default panic handler (printing the panic message to console) also requires OS support, which we've removed with our no_std statement. We can put together our own by adding a function with the required signature and adding the #[panic_handler] annotation to let Rust know about it.
#[panic_handler]
fn panic(info: &PanicInfo) -> ! {
    loop {}
}
For now, it'll do the same as the main function. We'll have something useful to add here later.
Let's add that and try cargo run again. Will this work?
Targets
No.
found duplicate lang item `panic_impl`
the lang item is first defined in crate `std` (which `test` depends on)
first definition in `std` loaded from <your home dir>/.rustup/toolchains/stable-x86_64-unknown-linux-gnu/...
second definition in the local crate (`loader_test`)
Our panic handler is colliding with the default implementation provided by Rust for Linux systems. Of course, we’re not even writing code for a Linux system.
The idea of “what system am I compiling for” is called a target in Rust, and it’s usually determined by what system you’re running the compiler on. If you use a target that isn’t the current system, it’s called cross-compiling. This comes up pretty often in OS dev, since you’re (hopefully) writing your code on a computer that already has an operating system.
We have to tell Rust that we’re compiling for a UEFI target. Luckily, there’s one built in called x86_64-unknown-uefi. You can tell Rust to use it via adding a flag to your cargo commands:
cargo run --target x86_64-unknown-uefiBut, this is annoying to type and your IDE is going to complain about the panic_handler anyway, since it doesn’t know you’re going to be adding that argument.
Instead, you can set a default target for your crate. Create .cargo/config.toml in your crate’s root directory and put this in it:
[build]
target = "x86_64-unknown-uefi"
(Using this method will cause us some annoying problems, but it’s the only way to do it. Consider this foreshadowing.)
Alright, now can we run it?
Running a UEFI binary
No.
target/x86_64-unknown-uefi/debug/loader-test.efi: Invalid argumentThere is one last thing we’ve forgotten about: We’re supposed to boot into this program, and our computer is already on. Unfortunately, cargo run won't be able to run our program at all.
You could, actually, stick your built executable on a USB drive and configure your computer to boot from it. I wouldn’t recommend it because:
- Copying your code onto a boot drive and waiting for your computer to reboot after a code change will be horrible
- Debugging on a computer that hasn’t even booted yet is horrible
- You might mess up your computer (horrible). I haven’t had this happen but my computer (and yours maybe) is pretty expensive. Best not to risk it.
Instead, we’re going to use a VM, which will pretend to be a UEFI-enabled computer while running sandboxed in a host OS. This fixes all our problems.
QEMU
There are a few choices for this, but we’ll be using QEMU. This post is already getting pretty long, so I’ll let you figure out how to install it on your system of choice. Come back once you’re done.
...
Ok, now that QEMU is installed, we need to load it with a UEFI implementation, that is, the code that implements the UEFI APIs we call. If you buy a real computer, this would be provided as firmware by the manufacturer of your motherboard. For QEMU, there is OVMF, an open-source implementation of the UEFI standard. You’ll need to get an image of the UEFI code (a .fd file) and then tell QEMU to use it.
On Linux, you can get OVMF via your package manager of choice. I'm going to assume you're using apt because I can never keep track of the other ones.
apt install ovmf
cp /usr/share/ovmf/OVMF.fd <your project dir>/ovmf/OVMF.fd
I’m not on Linux 😟
It’s ok, I wasn’t either when I was first doing this. I use Windows Subsystem for Linux now, which has the good parts of Linux (development tools) without the bad parts (everything else). If you don’t have access to a package manager there are pre-built binaries here. They’re old, but it doesn’t really matter for what we're doing. It’s frankly mystifying exactly which file you need, so just download this one.
It’s an .rpm so you’ll have to unpack it (7Zip works). Then, you want /usr/share/edk2.git/ovmf-64/OVMF-pure-efi.fd inside the archive. Take that file, and copy it to /ovmf/OVMF.fd in your project directory. Please rejoin the blog post in the next sub-heading.
Boot image
Finally, how do we tell QEMU to boot into your program? A UEFI system will run whatever's at /EFI/BOOT/BOOTx64.EFI automatically on boot. QEMU lets you mount directories to the virtual machine, so we need to prepare a little boot volume. Make a new folder bootimg in your project directory and copy your executable into the right folder:
- <your project folder>
  - bootimg
    - EFI
      - BOOT
        - BOOTx64.efi (your executable, renamed)
And now at long last you can run QEMU with the right arguments, passing both the BIOS file you downloaded and the bootimg/ folder you created:
qemu-system-x86_64 --bios ovmf/OVMF.fd -drive file=fat:rw:bootimg/,format=raw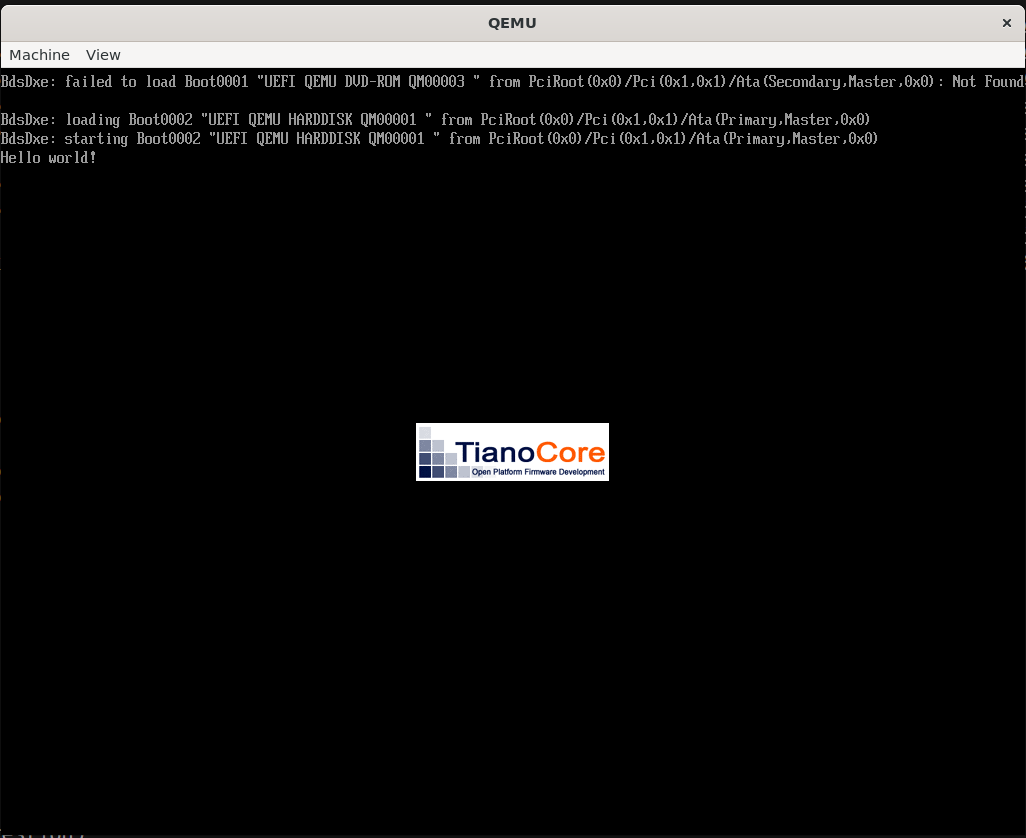
And there's our helpful message!
If you want to see everything we've done today together, I've put together a copy of our setup on GitHub. It also has OVMF pre-downloaded, and a Makefile to automate some of the file shuffling we talked about earlier.
Next time: we’ll write some actual code. See you in the next post.